Tag: writing

  • Reworking Tyranny of Dragons 10: Oyaviggaton

    Reworking Tyranny of Dragons 10: Oyaviggaton

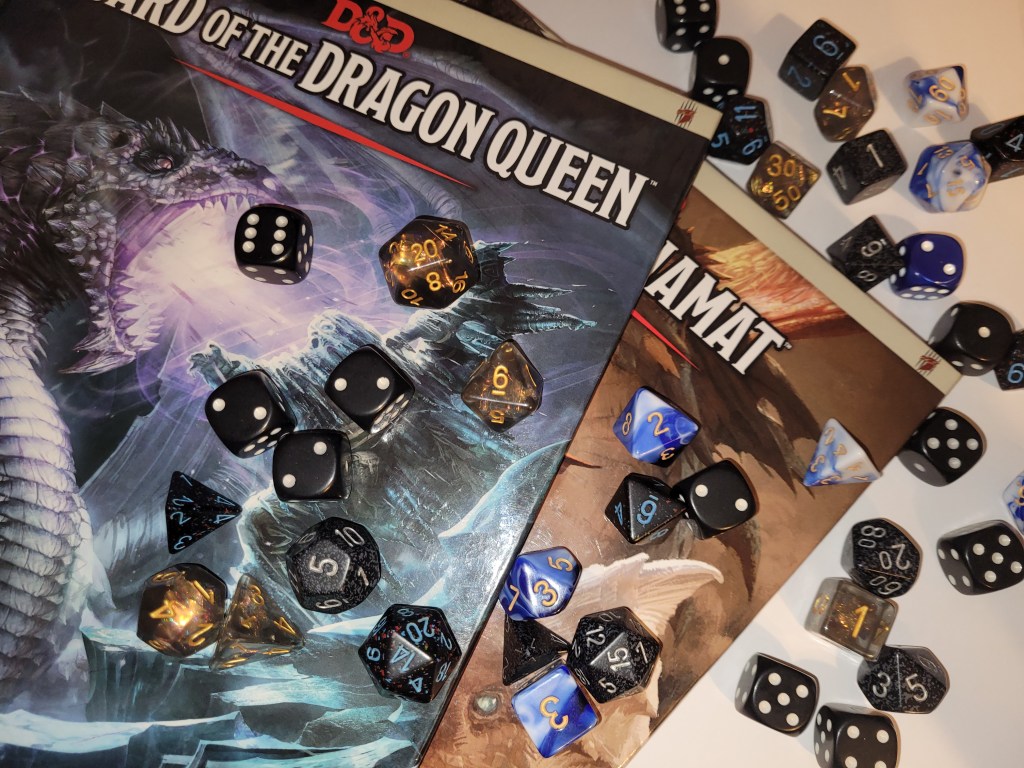
    When I first ran Oyaviggaton in 5th edition’s infancy, I found the dungeon a bit repetitive and unchallenging. In my opinion, a party of 8th-level heroes have well-outgrown combat encounters with kobolds, and trolls have shifted more toward minion-tier than being challenging on their own (though, it looks like now the module references the Ice Troll statblock added in Rime of the Frost Maiden, which looks a bit better). Its saving grace was Arauthator, with a challenge rating of 13 he’d be a challenging fight for many tables at 8th level, but with the other encounters proving so trivial, they might arrive with most of their resources intact and dispatch the dragon easily. (After all, dragons in base 5th edition dealt a lot of damage but couldn’t sustain much themselves.)

    With my adjustments to the plot of the module, my party was arriving to Oyaviggaton at 11th or 12th level rather than 8th, and they were covered in powerful magical items. One CR 13 dragon and several kobold encounters weren’t going to cut it. A duel with one CR 5 gladiator wasn’t going to cut it.

    We had to make some sweeping adjustments here to address both of these issues.


    Resetting the Scenario

    In the module, Oyaviggaton is home to the white dragon and the tribal Ice Hunters. The former is a deadly foe known as Old White Death, and the latter are unwelcoming and unkind, with their people having been enslaved by Arauthator for generations. Additionally, the Draakhorn was last seen on Oyaviggaton, and it has been taken away to the Well of Dragons, which isn’t the first or final time that an item our heroes are sent to collect is already out of their hands.

    So, first up, we gave Arauthator a promotion into an ancient dragon. My party would’ve mopped the floor with an adult dragon at their level, so he got a valuable elevation (and he still died shockingly fast, more on that later).

    Second, I wanted to change the Ice Hunters pretty substantially, too. One of the players at my table is the guy who ran Rime of the Forstmaiden previously, and one of his regrets was he didn’t use the werebear very much during his run. I’m also fond of werebears, so I decided that the tribe on Oyaviggaton were lycanthropes living in self-imposed exile. They were in control of themselves, but they remained away from civilization all the same. They visited Oyaviggaton yearly for a coming-of-age ritual, and Arauthator pressed them into his service. Rather than having laired on the iceberg for generations, I decided he’d come at the behest of the Cult of the Dragon, who wanted to place the Draakenhorn there (more on why in a moment). These warriors, the Urrasa tribe, were unwelcoming not because they served the dragon faithfully, but because they witnessed what became of Maccath the Crimson’s allies and they wish to spare our heroes from that gruesome fate.

    Lastly, the Draakenhorn is here on the iceberg, but it is well defended. The purpose for its stationing here is that an artifact on the stolen Hosttower of the Arcane in Arauthator’s lair is adversely affecting magic. Prolonged exposure is completely muting one’s connection to the weave. It’s why no one has heard from Maccath the Crimson; it’s why the Urrasa tribe has grown somber from the silence of the ancestors.

    Now, this last adjustment wasn’t as necessary as some of the others as fallout from the restructuring of the module. However, I really enjoyed the episodes of Critical Role exploring Eiselcross and dealing with the weirdness of magic there, and I had a fun idea for a puzzle-based dangerous encounter that’d help break up the monotony of fighting dragons and dragon servants all the time.

    So, altogether, we have a pretty decent dungeon of 4 encounters: a trial of strength by the Urrasa tribe, the ancient white dragon, the Netheril Accumulator I invented, and the defenders of the Draakehnhorn.


    Arriving at Oyaviggaton

    After the council reconvened and set them on their new task, our heroes were teleported to Oyaviggaton by the apprentice of on the wizards on the council, Taern Thunderspells. This apprentice was a new NPC, an orcish woman named Tsorina. Through this NPC I was able to give an in-character reaction to the weirdness of magic and provide a new tension: the heroes could not teleport away from the island until they dealt with the accumulator (not that they knew why magic was so strange here, yet). Tsorina, not a wizard for battling in the field, started freaking out. They calmed her down and made their way to a distant firelight on the horizon.

    These fires were those of the Urrasa tribe. After a brief social encounter, the three leaders of the tribe invited the heroes up to the Ridge of the Lost. Here, they tested our party’s strength, then revealed the gruesome reminder the White Death had installed here: the frozen corpses of their tribesmen who tried to flee and Maccath’s allies, the only other outsiders to have come to Oyaviggaton in many years. With their fortitude proven, the chieftain gave them a heading for Arauthator’s lair.

    Then, on a roll of a natural one and an eight on a d8 for a random encounter, they were ambushed by the dragon himself in the snowfields. Despite my intent to escape with Arauthator, the Owlin ranger pursued the beast himself. He nearly died for it, but survived with a mere 2 hit points and managed to take the dragon down. He’d flown far ahead of the party in this chase, too, so it’d have been lights out if he hadn’t secured the kill, perhaps permanently.

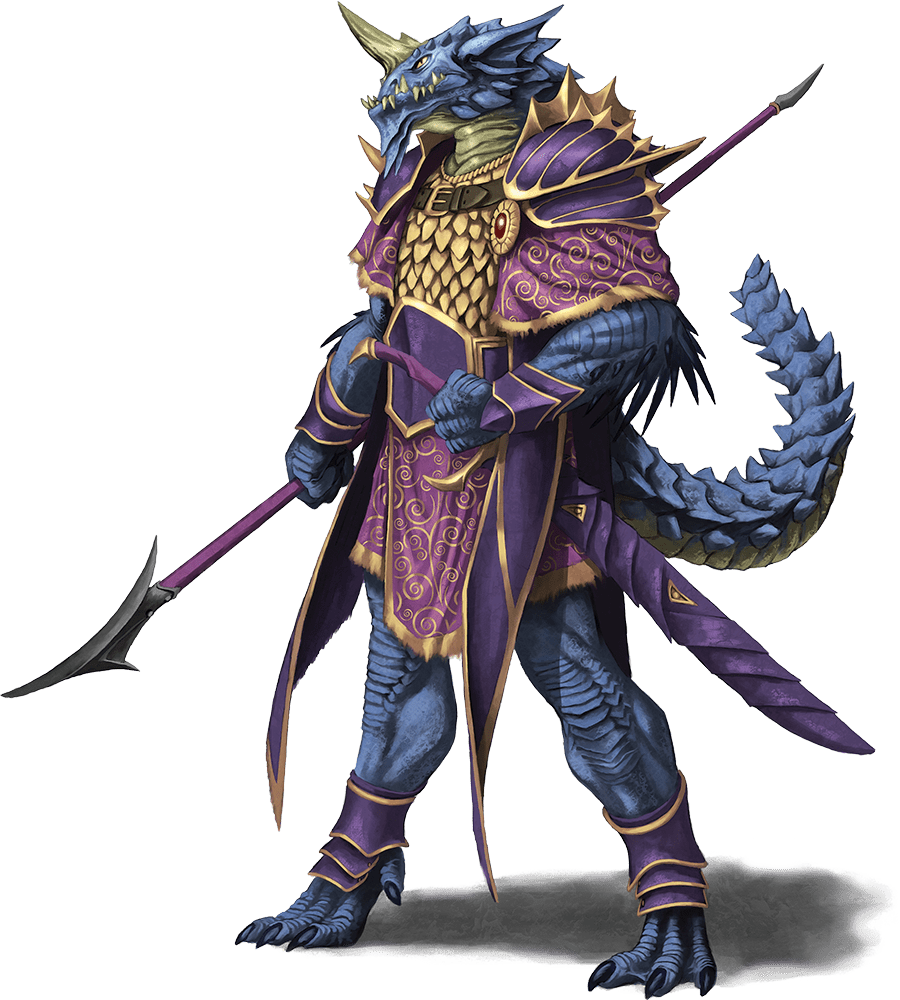
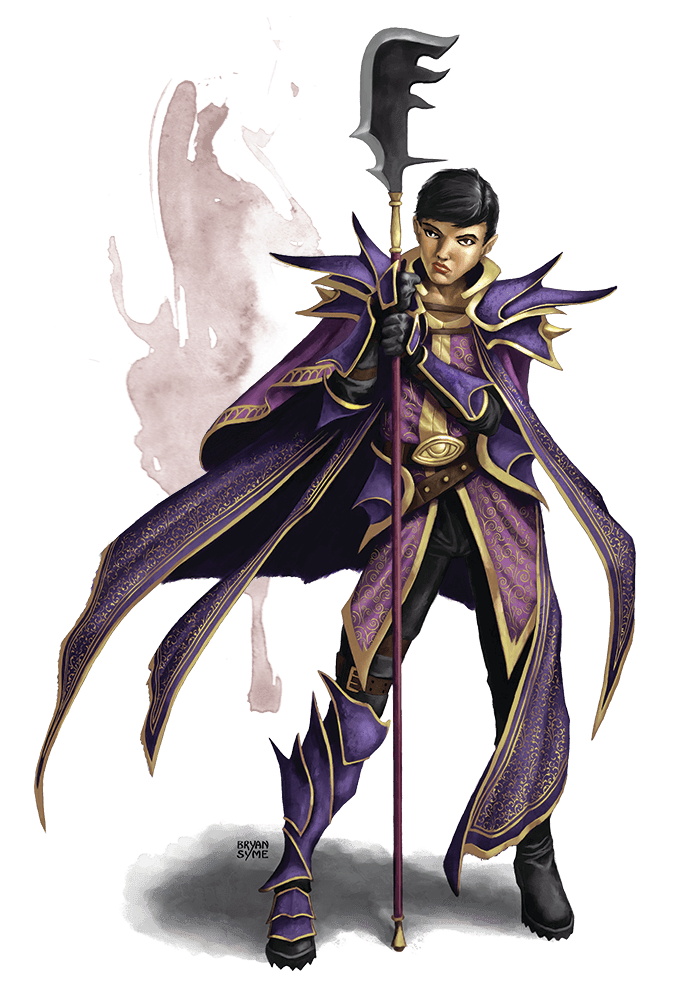
    The heroes continued on to the dragon’s lair, where they found the kobolds were not reverent followers of the dragon but were slaves themselves who celebrated his demise. Within, they met Maccath the Crimson who’d lost her ability to cast spells from her exposure to the accumulator but was still an expert in arcane matters.


    The Netheril Accumulator

    Atop the stolen Hosttower of the Arcane was the arcane mechanism exerting pressure upon the weave across Oyaviggaton. This battle consisted of three “Lodestones” that needed to be simultaneously deactivated (within the same round). Each lodestone had 300 hit points, but due to the collected arcana, they had taken on something like a personality and would expend their accumulated magic to defend themselves. To deactivate the lodestones, a character needed to spend their action performing an arcana check whose DC was equal to the lodestone’s current hit point total divided by ten. So, an unharmed lodestone had a DC 30 check, while one with 131 hit points left had a DC 13 check.

    These lodestones became much more dangerous the lower their hit point totals were, however. The table below was my reference for the encounter.

    Lodestone HitpointsBehavior ModeAction Adjustments
    250 – 300TerseThe lodestones use cantrips, and spells of first or second level.
    150 – 249AngeredThe lodestones gain the use of spells of 3rd, 4th, and 5th level.
    80 – 149FrightenedThe lodestones gain the use of spells of 6th and 7th level.
    1 – 79PanickedThe lodestones gain the use of spells of 8th and 9th level.
    0DetonatingAt 0 hit points, the lodestone explodes.

    The lodestones didn’t roll initiatives, instead they acted on steps 20, 15, and 5.

    And their explosion was an apocalyptic threat (at least for Oyaviggaton). If any were reduced to 0 hit points, then after one round (unless stalled by some miracle), it would erupt in a burst of pure arcane energy. All creatures within 30 miles would need to make a DC 15 Intelligence saving throw. On a failed save, they were Stunned and would suffer 30d10 force damage. Any creature reduced to 0 hit points by this damage would be reduced to ash. Creatures that succeed on the save take half damage and are not stunned. Additionally, magic items would’ve had to make a saving throw or cause a secondary detonation based on their rarity (like that moment in EXU: Calamity at the start of the 4th episode).

    Luckily, my players heeded Maccath’s warning and did not break any lodestones. One almost got to use a 9th level spell, but they completed their checks right before its turn. Oh, and each time a successful check was made, that lodestone was pacified until the end of the round.

    Maccath couldn’t do much to defend herself in this battle, but she added an incredible +13 to her arcana checks and she was willing to aid our heroes. So were a pair of kobolds they’d befriended, but they died pretty much immediately. (They were using the baseline kobold statblock; after the Owlin ranger convinced them to join the battle, they were doomed.)


    Attacking the Draakenhorn

    With the accumulator fixed and the dragon defeated, our heroes decided to rest overnight to recover before battling over the Draakenhorn. This had its own consequences. An additional enemy joined the retinue defending the horn: a fresh simulacrum of Rath Modar, equipped with knowledge of our heroes and their abilities. With the planned Blue Abishai here, that placed two powerful spellcasters opposed to the heroes. They also had to contend with ice trolls, and the commotion drew an unaligned Remorhaz to the battle.

    Our heroes prevailed, though a failed Wisdom saving throw allowed the true Rath Modar to observe them once again, and it was a great opportunity to showcase an abishai’s abilities to them, as one was soon going to be a major threat, but more on that next time.


    As always, thank you for reading! I’d meant to get another post out between this and the last one, but. Well. I’ve been playing a ton of Midnight. Even this post was drafted close to last minute! Here’s hoping I find the time between now and next month to get some other posts up.

    Good luck out there heroes.

  • Reworking Tyranny of Dragons 9: Statblocks

    Reworking Tyranny of Dragons 9: Statblocks

    The most consistent way I adjusted this module during our run of the campaign was tweaking and modifying the various statblocks present therein, especially once the 2024 rules released and I allowed many of my players to rebuild their characters with the new rules. Since 2014, there’s been a non-negligible amount of “power creep” in the game’s rules. Many subclasses that were printed in sources added later into 5e’s lifespan had more built-in power than those found in the old PHB. Then, with the 2024 ‘Handbook, many classes got major buffs to their throughput; spells changed, and many other features were edited in various ways.

    In this new set of core rulebooks, the Monster Manual was the last book to released. With the PCs feeling more powerful than ever, it was going to take some work to make appropriately challenging encounters from those written before 5th edition had even been published. Luckily, I have more than a decade of experience running this game (hell, this edition), so I knew a few healthy ways to rewrite these statblocks.

    Early Game Examples

    When my table played the earlier sections of the module, the 2024 books were still forthcoming. As such, we didn’t have the same number of major changes in those first dozen or so sessions, but there were still monsters I wanted to adjust.

    Ambush Drakes and Ambush Drakes (B)

    In the statblock provided by the module, an Ambush Drake has Pack Tactics and Surprise Attack. The latter grants the ambush drake an additional 2d6 damage if it hits a Surprised target in the first round of combat. This, added to its usual bite damage of 1d6+1 would average out to 11. Most PCs at level 1 have somewhere around 9 – 13 hit points. If one were to use the creature’s CR to build an encounter, and use two of these in battle against 4 level 1 PCs, it’s quite likely two of those PCs are unconscious before getting a turn, especially if using the 2014 Surprised condition.

    Naturally, I don’t think that’s likely to make a very good encounter. It could be dramatic, sure. You could, if using the scenario I described in my post on how we opened this module, have the Ambush Drakes kill some traveling civilians instead of the heroes. There’s ways to use the statblock as it exists without creating a bad experience for your players, sure.

    The thing is, I also wanted to have these Ambush Drakes have the limited ability to do a weak dragon’s breath. So, I made the alternate statblock “Ambush Drake (b)” which kept Pack Tactics but lost Surprise Attack, and instead gained a once-per-day breath weapon determined by the drake’s color that dealt 3d6 damage halved by DC 11 Dexterity saving throw.

    The encounter I ran in that first session was 1 Ambush Drake, 2 Ambush Drakes (b), and 1 Guard Drake. A quite difficult encounter, but one for which my players had an ally and not all of the attacks were coming for them; some landed on horses, some on other travelers, etc. If I’d needed to, I could’ve adjusted the difficult a little down once more by choosing to use Ambush Drakes with breath weapons target the damage types my players had resistances to; we had both a Draconic Bloodline Sorcerer with Fire Resistance, and a Fire Genasi character. With no adjustment to the statblocks, this fight could’ve been tweaked even further to reduce its threat.

    The Grey Hag

    The next homebrew statblock didn’t show up until my party battled the boss of our added homebrew dungeon while in the On the Road chapter. See, the thing about my games is I use hags pretty much every campaign. Maybe it’s confirmation bias, but I think I run them well. My players still talk about Edith Marshcradle, who they battled near the beginning of a campaign that began back in November 2020 (couldn’t appreciate VTTs more for helping us through that year). As we’re getting closer to beginning my next homebrew campaign, one of my players has asked multiple times if there will be more hags in it; hell, I shoehorned one in here, in the module about the Dragon Queen getting summoned up from Avernus.

    Point is, I’ve used hags a lot, and I wanted to make a unique encounter for my players here. I took inspiration from the boss battle with Auntie Ethel in Act 1 of Baldur’s Gate 3, and gave this Grey Hag the ability Divide and Conquer. As an action, the hag created 1d2+1 semi-illusory duplicates to aid in overwhelming her foes. Each had 1 hit point and dispersed into mist when defeated, but otherwise shared the Grey Hag’s statistics. Each duplicate acted on its own initiative, but they could only cast cantrips or strike with their claws. They all appeared within 20 feet of the Grey Hag’s original position when created, and as part of the same action, the true hag could appear anywhere within that radius herself. I, additionally, gave the Grey Hag a bonus action she could use to swap places with one of her existing duplicates, to ensure she could escape her foes without needing to spend her action to create more of them or losing her ability to cast a leveled spell and strike with her own claws.

    This fight proved fun, and a bit uniquely challenging for my party at the time as they were not yet 5th level and no one had access to Magic Missile which would’ve changed the tenor of this battle dramatically (just as it can in the fight with Auntie Ethel, come to think of it).

    Mid Game Threats

    As they tipped over into the second tier of play, I knew I could create even more challenging monsters for them to battle. The first monster they battled here that I had a unique spin on was the lizardfolk in Castle Naerytar I named Blessed Ulithara. This ultimately wasn’t too in-depth of an adjustment; I merely allowed her to select spells from both the Sorcerer and Cleric spell lists as a result of her dragon blessing. Instead, I wanted to highlight the adjustments made to a couple recurring cultist villain: Rath Modar.

    Rath Modar’s Simulacrum (Skyreach)

    In creating the simulacrum for their encounter in Skyreach castle, I kept in line with the Simulacrum spell rules, and determined a number of spell slots the construct had used in conquering Skyreach Castle that he simply wouldn’t have. This allowed me to limit the ability of a spell caster I really wanted to buff up for the final battle of the campaign, while also giving a good challenge to my party when they faced him. As such, despite buffing Rath Modar up to a 16th-level caster (more on that later), this simulacrum of the red wizard had nothing higher than 1 6th-level spell slot, had only 1 4th-level spell slot remaining, and had spent a 1st- and 3rd-level spell slot prior as well.

    When the encounter began, I spent that 6th-level slot on Summon Fiend, but instead of using the spell as written, I just used it to explain the presence of 4 Hellhounds included in the encounter. I, additionally, made Rath Modar (prime) an Evocation wizard instead of an Illusionist, and I allowed the simulacrum to Overchannel once per day as well. The intent there was to show my players what kind of wizard Rath would be when they faced him, to ensure they got information from battling his simulacrum, just as Rath was getting by observing it.

    Oh, I also only gave the simulacrum a homebrew item, the Amulet of Shared Sight (mentioned previously!) instead of Rath Modar’s usual equipment.

    While on this leg of their adventure, my party was also accompanied by Talis the White (B1), whose statblock I had to rebuild since I wanted her to be a wizard as well, instead of a cleric. It wasn’t much more than an adjusted spell selection, though, so no header for her.

    There was, however, one other encounter I adjusted in Skyreach Castle: Rezmir.

    The Juvenile Dragons

    As I reached this part of this post, I realized I brushed right past revisiting the Cultist Camp and investigating the Dragon Hatchery earlier in this series! It certainly makes sense I did; I ran the dungeon mostly as written. The exceptions were that I pulled Frida Maleer and Cyanwrath out of the dungeon to ensure they were saved for later, and I had the party encounter a Black Dragon Wyrmling in the hatchery room, along with two previously hatched eggs.

    Along with some documents and Frida’s underling, the hints here were that the cult was trying to accelerate the growth of dragons to have more resources at their disposal in amassing the wealth they needed to summon Tiamat. My party didn’t quite fit the puzzle together (and I wanted this to be more of a lingering thread, anyway), which allowed the presence of two dragons beside Rezmir in Skyreach Castle to be quite the surprise!

    Now, I didn’t want to drop even two young dragons into this encounter. My party was only around level 7, if my memory serves. That would’ve probably killed them. However, a pair of wyrmlings with Rezmir would’ve been a bit too easy for my table as a boss encounter. So, we made a statblock right in the middle: juveniles.

    We’ll use the blue one I made for the example here. Instead of a wyrmling’s 6d6 breath attack or young dragon’s 10d10 breath attack, we instead had one that dealt 6d10. Dice pool equal to the wyrmling, dice value equal to the young dragon. Additionally, I kept it at 2 attacks for its Multiattack action, but to-hit bonus was settled at +7 (right in the middle), and the damage values were closer to that of the young dragon’s. The juveniles, having magically aged, were also still primarily running on instinct. Without Rezmir’s commands, they behaved more like beasts. They were only, like, two months old after all.

    Climax Enemies

    I did adjust many of the foes my party would come to encounter in the climactic battle in the Well of Dragons as well (see above allusions to the evocative* Rath Modar), however, most of the changes there tied quite directly into the way I designed that final encounter. So, between that and this post being plenty long already, we’ll save that information for when I write about that finale. (*Yes, I know it’s a bad pun.)

    As always, thank you for reading. Good luck out there, heroes!

  • Reworking Tyranny of Dragons 7: The Tomb of Diderius

    Reworking Tyranny of Dragons 7: The Tomb of Diderius

    It’s a common experience in D&D that we DMs make magic items we don’t fully understand the ramifications of. In this run of the module, nothing surprised me more than an Amulet of Shared Sight my players looted off of the Rath Modar simulacrum they defeated in Skyreach Castle. When I made it, I thought, “This will be a fun way to let the party understand that Rath Modar watched them kill his simulacrum.” Then they used the damn thing all the time to let their allies scry upon them.

    Such was the case after they defeated Neronvain. My party used this amulet to inform King Melandrach, and with a king’s resources at his disposal, a court wizard arrived swiftly to bring them to the king’s palace. The stayed overnight in the palace, resupplied, and asked that the wizard take them as close as he could to the Tomb of Diderius so they could try and rescue the Zhentarim agent before her fall.

    A side-effect of how I presented this quest made my party feel the pressure of a ticking clock to a degree I didn’t fully intend. Don’t mistake me, I’m glad my players were invested enough in the campaign that they pursued their quests with haste; I just hadn’t considered the extent to which I accelerated their actions with the situation I presented. Either way, after a quick teleport, my party arrived in the ancient debris of a long-crumbled town outside the Tomb of Diderius.


    Scrapping Ss’tck’al

    I didn’t care for the Yuan-ti dungeon the first time I ran this module. Besides being a bit out of leftfield, it also contains what would end up being some repetitive encounters for this run of the module, given how I changed Castle Naerytar.

    The Tomb itself also contains some design choices I find are more aligned with an adversarial DM’s style. As an example, the last time I ran this module, my players were worn out by the time they reached the room filled with Bearded Devils. These fiends have express orders to attack anything that leaves from a chamber to the side, so they don’t attack the party when they first arrive here. My table at the time decided to try to take a short rest in this room, with the exception of their barbarian. He, uninjured, decided to explore the room the Bearded Devils were watching, and discovered the Wraiths and Specters within. His party tried to aid him, but unfortunately, the specters killed him before they could intervene, and the Wraith turned him into another specter. This was one of the only permanent deaths I’ve had at a table in all my years running D&D, and afterward, the Bearded Devils followed their command and attacked the wounded party as they tried to flee with the corpse of their fallen ally.

    That, of course, all happened over ten years ago. Were I to encounter a similar situation again, I’d definitely do a lot differently; I’d call for an explicit Insight check to understand the devil’s motivations; I’d give more clues that something nefarious was behind that door the barbarian entered alone; I’d have had a disclosure during session 0 about character death and ensured we were all on the same page about such things. Live and learn, right?

    This isn’t to mention that I’ve completely changed the scenario here. There’s no question that the White Dragon Mask has been taken inside the tomb; there’s no need for divination pool, no need for gathering information at Boareskyr Bridge, and with my party’s teleport, no need for roadside travel or random encounters. Ultimately, I needed an entirely new dungeon.


    The (New) Tomb of Diderius

    After absconding with Varram’s mask, the Zhentarim agent fled into this old and ancient tomb home to a terrible curse of my own making: Lich’s Breath. I reimagined Diderius as a wizard of a long-forgotten age who defeated a powerful lich. However, in that creature’s death throes, it laid a curse upon Diderius and all his allies, one that would see them eternally undead, and that their touch would spread the curse to others. To save his homeland, Diderius led his warriors away, where they settled and built the tomb that would house them all. With the aid of a Hallow spell, the undead were trapped inside forevermore.

    Lich’s Breath was a simple enough curse. Any time my players began their turn within 5 feet of any of the cursed undead, they needed to make a saving throw against the curse. It wasn’t a terribly high DC, but a few still fell prey to its effect, though they wouldn’t know it immediately. Instead, they only felt an unwelcome chill settle upon them, and after time, they’d see a slight green glow upon their eyes in their reflection. Luckily, we also had a cure on hand: Holy Water. Imbibing Holy Water forced a character to make a Constitution saving throw (one which they could elect to fail), and on a failure, they suffered 1d6+1 radiant damage and felt the curse leave them.

    This revealed that our Zhentarim agent only fled within because she must have had no other options. Over the centuries, the undead had been lulled into inaction; something close to peaceful rest, stirring only when their tomb was plundered. Thus, our rogue agent was able to proceed through the dungeon with relative ease, whereas her first and second pursuers faced greater and greater danger, and our heroes faced the worst of the lot (more on those two pursuers in a moment).

    When my party entered the dungeon, they discovered the entryway mostly empty. Therein, there were two defeated undead and tablets that revealed the story of Diderius and his people. They realized the defeated undead within were slowly reconstituting and decided to smash one’s skull and consecrate the remains with Holy Water to try and prevent it. I improvised a small encounter with an Allip in response – to try and stave off my party thinking their goal here might be to permanently eliminate the undead.

    Mostly because their first (planned) encounter within the tomb wasn’t meant to be a battle, but a mad dash through a horde of undead to reach a safe space on the other side: a shrine to a forgotten goddess that had its own hallowed ground and an ever-filling bowl of holy water. With a truly absurd number of undead on the board and a hallway stretching just over four-hundred feet, the party needed to engineer some creative solutions to get through the horde. This is a type of encounter I’ve been experimenting with for a while; this version of it worked pretty well, but if I were to run the module again in the future, I think I’d decide to do something else instead. Perhaps a wave-based encounter and multiple rooms in sequence, rather than one long hallway. (Talespire did a lot for making this encounter function at all, too.)

    In the hallowed shrine, my party managed a moment’s rest. Then, they discovered the sarcophagi of Diderius’s Honor Guard. There were eight sarcophagi within the room, but three of the undead had already risen and been defeated by those who’d entered the tomb before our heroes. So, our party battled five of the undead warriors made from a retooled Knight statblock, edited to be undead, have more hit points, deal bonus necrotic damage instead of radiant, gained a recharge 6 Life Drain attack equivalent to a Wraith, and a Zombie’s Undead Fortitude. This gave us a good encounter, and the threat of having to battle an additional three of them if the party decided to rest again urged them further into the dungeon, rather than back into the hallowed shrine behind them.


    Back-to-Back Boss Battles

    In the following room, they met Varram. Our White Wyrmspeaker found himself utterly stuck by a door proposing a riddle – a riddle he figured out quickly, but one that required more than just the answer. My party didn’t approach quietly, so Varram turned and faced them down with a mighty enchanted axe and his Orb of Dragonkind (White). I intend to have future post in the series devoted to the ways I tweaked statblocks for this run of the module, so I’ll save  the specifics for later. Ultimately, my party succeeded, and they too answered the riddle quickly.

    The door read, “I am a shadow which rests upon thy shoulders like a heavy, dragging cloak. By thy own agency am I donned. In thy ear I whisper of the words unsaid and the roads untraveled. Haunted by me, perhaps evermore, I may still grant thee perspective or absolution, if thou might quiet the darkest of my musings. Speak aloud my name, and this door will open.” After a few guesses, my party landed on “Regret,” and I confirmed the answer by saying they hadn’t heard it clearly before, but when they’d entered, Varram had been saying the word over and over.

    The trick was that one needed to consider a regret as they spoke the word, and rather than open, the door simply became immaterial to the speaker. Over the years, I’ve enjoyed employing a puzzle with a simple solution, but one that requires a bit of roleplay from the players to fully solve. One by one, my players spoke of one of their character’s regrets, and they were able to enter the true Tomb of Diderius.

    Within we battled a Mummy Lord, a creature of a CR well beyond what my party could theoretically handle at their level, but one they conquered all the same, given the lack of additional enemies in the room and well rolled saves against the Command casts from his Legendary Actions. An upcasted Chromatic Orb dealing fire damage absolutely rocked him, too.

    With his defeat, my party proceeded to the final room of the tomb, a private space Diderius had here as he waited for the end of his life. Within, they found a final inscription from Diderius, musing over his terror of mortality having given way to his fear of this tomb one day being plundered and leading to the spread of Lich’s Breath. He implored any who entered to look into a mirror and check for the signs of the curse before leaving, and this was his final gambit. It was a Mirror of Life Trapping, which successfully snagged one of the members of my party. When they left, they ended up taking the mirror with them, having discovered in their work to free their ally that several other would-be graverobbers had been ensnared within the mirror, and many of them (if not all of them) were cursed.

    Ultimately, my party arrived too late for the Zhentarim agent. Having hurried into the tomb before Varram’s arrival was another rival of both his and my players: Talis. With the mask stolen, she pursued the thief and reclaimed it to become the White Wyrmspeaker herself, leaving a note to taunt Varram. That allowed our sorcerer to recognize the handwriting, and know who’d gotten the best of them here.

    This had always been the way I intended to end this dungeon; hell, in the module the mask is already back at the Well of Dragons by the time Varram uses the Divination Pool in the tomb. However, had my players elected to act with pragmatism, I think I’d have given them the chance to oppose Talis here in this small room to try and take the mask for themselves. I think she’d have had the upper hand with the spells at her disposal, and preferably she’d still teleport away before she could be slain; that still would give the party information on the new White Wyrmspeaker, who they’d be certain to encounter again in the future. And, hey, if they somehow pulled it off, well. The next post in this series will reveal my contingency. Stay tuned.


    As always, thank you for reading. Good luck out there, heroes.

  • Reworking Tyranny of Dragons 6: The Ruin of Altand

    Reworking Tyranny of Dragons 6: The Ruin of Altand

    Over the course of the last five posts in this series, I’ve talked about the ways I adjusted this module as I ran it for the second time. So far, most have been pretty minor overall. I preserved some characters, I threw in additional dungeons or changed the encounters therein, and I was more thoughtful with how to express the tension of the On the Road chapters. Yet, structurally, the module’s mostly run along the tracks it gives you, hasn’t it?

    This is where that changed.

    The council’s first meeting was not spurred on by the distant sounding of the Draakhorn (or Draakenhorn as it came to be known in my campaign). Instead, when my party had first moved through Waterdeep, they’d briefly met Remallia then, and she alluded to the eventual formation of the council. With Brok there to vouch for them, she asked that the party specifically discover the ultimate destination of the stolen gold and what the cult intended to do with it. Having now returned with both pieces of information and a Mask of the Dragon, Remallia wanted them to join her at the meeting. More specifically, she wanted them to become the Council’s Executors: their clandestine agents in opposing the cult and preventing their success.

    As the day approached, she laid the groundwork for that charge, and the party prepared to sell themselves in the meeting. In addition to the criteria on the scorecard in the module, I added several other items to affect each faction’s affinity: whether my party dressed as warriors or politicians; whether they ceded the Mask of the Dragon they found to the Platinum Vault beneath Bahamut’s temple in the city; their reaction to the council implying they might pick other adventurers instead of them. These all had different reactions from each faction, but they aren’t particularly necessary for the adjustments made to the module or the existing scorecard structure. (I just wanted to have additional reactions to the party’s decisions.)

    The party proved successful and accepted their first task from the council. Rather than sending them to Oyaviggaton to handle the Draakenhorn (since we’re saving that for later; more on why in a future post), we instead had the choice between which Wyrmspeaker to pursue first: Neronvain or Varram.

    As in the module, the man most wronged by Neronvain is resistant to the party’s involvement. However, to spur them into more immediate action, the delegate of the Emerald Enclave revealed that Neronvain and his dragon Chuth had razed the village of Altand a mere two days before the council meeting. Alternatively, an agent of the Zhentarim had managed to steal Varram’s mask, but she had to flee into a dungeon to avoid being captured by the Wyrmspeaker. Without the party’s intervention, she might not last much longer.

    Deciding they couldn’t let Neronvain and Chuth roam free and continue their massacre of the elves, they ventured first into the Misty Forest.


    The Ruin of Altand

    Altand doesn’t get razed in the module – at least, not to the extent that I razed it in this campaign. With Altand, I had a problem to solve. See, I mostly run my games with experience points rather than milestone. That’s usually never a problem, but here, since I’d brought Neronvain’s chapter forward in the module and it was the first the party chose to pursue, I decided to add a dungeon here. Rather than run a series of social encounters with a particularly obstinate elf (at least that was how he’d come across the last time I’d run this module), we had a ruined village to explore. Within the village were several special encounters; an ettin collecting spoils with his hounds (dire wolves); a large group of kobold looters; the mad specters of the slain villagers; and a grovewarden blighted by the dragon’s poisonous breath. Once defeated, the ettin disclosed that there were two more of his kin in the dragon’s lair; the party spared and captured one kobold and paid him to lead them to stronghold; and the party got their first taste of how dangerous the dragon’s breath would be from the blighted grovewarden, as I simply added a 30-foot radius exhalation attack to a treant’s statblock with damage equal to that of an adult green dragon.

    This proved to be a fun dungeon that showed the party firsthand the devastation left by Neronvain’s raids. It helped cement that choosing to contest him first to prevent more attacks like this was a great decision. It also made them question their promise to King Melandrach. As in the module, I disclosed that Neronvain was Melandrach’s son, and he asked them to return Neronvain to him alive.

    After dealing with all four encounters, my party secured a campground and took a long rest. In the morning, their kobold ally led them deeper into the Misty Forest, and eventually to Neronvain’s hidden stronghold. On the path, they were spied upon by critters corrupted by the dragon’s lair – for flavor, I described a squirrel’s eyes flashing and turning into a draconic green as it observed the party over their second night in the woods. Once at the waterfall that obscured the entrance to the lair, the party released their kobold prisoner/guide and paid him for his time. In return, he promised to use an additional wealth of gold given to him to try and keep the other kobolds of his warren from rushing to the stronghold if called.


    Neronvain’s Stronghold

    As in the module, Chuth awaited my party in ambush in the first room of the dungeon. Now, despite being a little underleved for a CR 15 dragon, my party’s damage output gave them a good chance to kill Chuth before he could retreat to the final room of the dungeon; and, due to a looted Crossbow of Warning, they were not under the imposition of the Surprised condition when Chuth ambushed them. So, we made a few light adjustments to this battle: first, the water was laced with a poison such that any wounded character would suffer 1d8 poison damage at the start of their turn if they were in the water. The major benefit here was Chuth had both a superior swim speed and immunity to this effect, disincentivizing pursuing him into the lair proper. Next, the water was murky enough to greatly obscure Chuth when submerged, allowing him the opportunity to hide from my potent ranged attackers. Lastly, as Chuth began to flee, a group of cultists rushed into the room from its other exit and began attacking the party with crossbows and spells. This diverted enough of their attention that Chuth was able to retreat, and he was on the verge of death when he did so.

    The last cultist alive surrendered to the party, and from him they were able to learn about the layout of the dungeon. I made some small changes to it, reducing it down to six total rooms. I basically cut rooms 3 and 4 from the layout in the module. I moved the Ettins to room 5 and made it the storeroom, and made room 7 a prison where the few survivors of Altand were detained. This room provided a social encounter, where my party needed to negotiate with a cultist warden holding the prisoners hostage to bargain for her life, one at knifepoint.

    In our run of the dungeon, my players used the robes of the cultists they defeated to sneak by the barracks (with the aid of Pass Without Trace). In the storeroom, they convinced the two ettin to allow them passage in exchange for their pick of the spoils in the storeroom. Lastly, the heroes successfully de-escalated the hostage situation, allowing the one cultist to flee and saving all the hostages. I’d run this cultist as someone choosing to abandon the cult after Altand, and not someone that would stab our party in the back by rallying the others after this encounter. I preferred this outcome for two reasons: one, my party was trying to get through the dungeon to pursue the dragon before either could rest and recover, and two, I didn’t want to run every member of the cult as a lost cause. The party had already spared and were on the road to redeeming other NPCs that began with the cult; I didn’t want that to only apply to named characters.

    From there, they ascended to Neronvain’s chambers. As in the module, there was a secret passage connecting this room to Chuth’s lair, and shortly after the fight began, Neronvain fled to battle beside his dragon. His two bodyguards remained and the party split themselves between these two encounters, half in pursuit, the others serving as their rearguard. This nearly made their rematch with Chuth deadly.

    Chuth, near his hoard, had recovered a great deal after their first battle, but he was not a full health. Unfortunately, neither were our heroes. The battle was condensed around the entryway into this room, and in the conflict our sorcerer fell unconscious into the poison water. His allies were able to slay the dragon immediately afterward, though, and they pulled him from the water before he died in it. The party proceeded to successfully capture Neronvain, and handed him over to King Melandrach.


    Thus concluded the first half of our adjusted Death to the Wyrmspeakers Chapter. Originally, I had both this and the following dungeon in the same post, but it ended up being much longer than I thought. Instead, the post about the Tomb of Diderius and Varram will wait until early January.

    As to the reasons behind this major restructure of the module’s path, I’ll go into further detail in a future post in this series. For now, suffice it to say that I wanted to party to get their hands on all the Masks of the Dragon they’d have the opportunity to loot (easily) before the second meeting of the council.

    As always, thank you for reading! Good luck out there, heroes.

  • Reworking Tyranny of Dragons 5: Masks of the Dragon

    Reworking Tyranny of Dragons 5: Masks of the Dragon

    Both when I ran this module at the beginning of 5th edition and as I was preparing to run it again now, I always had this distaste for the way the module advises us to withhold the Masks of the Dragon. The few times they’re within the party’s reach, it wants you to use a magic chest to teleport it away, to reveal it to be a fake, or otherwise deny the party their victory.

    I think that sucks. I think if my players have overcome these Wyrmspeakers, they should get that tangible reward for doing so. When I ran the module back in 2014/2015, my party looted the Black mask from Rezmir, and in my current campaign, they did so again.

    However, these masks are stated by the book to be a necessary component to the ritual to summon Tiamat. I’ve seen it interpreted that this just means that at least one mask must remain in the cult’s possession, but I frankly prefer it to mean that they need all five. This competes with my desire to allow the party to obtain them; if they’ve got them safe in their bags, how can I ensure the cult obtains them to summon their god? After all, as much as the characters want to prevent Tiamat from being summoned, my players absolutely want to throw down with the Dragon Queen of Avernus. She’s on the cover! We’ve got to fight her!

    So, how do we square this circle?


    How’s About a Curse?

    That seemed the most straightforward to me. When my current table vanquished Rezmir and claimed her mask, they were able to Identify it and learn its properties. I didn’t hide the curse from them at all, I gave them the full text of the item as I’d written it.

    Mask of the Dragon (Black)

    Wondrous Item, Requires Attunement by an evil creature.

    While attuned to a Mask of the Dragon, its bearer gains potent bonuses based upon the color of the mask. These items are necessary for the ritual to bring Tiamat into the world from Avernus, but they also corrupt any who possess them.

    This horned mask of glossy ebony has a skull-like mien. While in possession of this mask, any time you complete a rest, you must make a DC 12 Charisma saving throw. On a failed save, you must attune this item. If you are already attuned to three items, you select one that you immediately lose attunement to, replacing it with this item. If your alignment is not evil, it changes to become so (your alignment returns to normal once you are no longer attuned to this item). While attuned to the mask and wearing it, you gain the following benefits:

    • Damage Absorption. You gain resistance Acid damage. If you already have Acid resistance, you instead gain immunity to Acid damage. If you already have immunity to Acid damage, you retain it and additionally heal for half of the Acid damage you would take whenever you would suffer acid damage.
    • Dragon Sight. You gain darkvision out to 60 feet, or to an additional 60 feet if you already have that sense. Once per day, you can gain blindsight out to 30 feet for 5 minutes.
    • Dragon’s Tongue. You gain the ability to speak and understand Draconic. You additionally gain advantage on any Charisma check you make against Black Dragons.
    • Water Breathing. You can breathe underwater.
    • Legendary Resistance (1/Day). If you fail a saving throw, you can choose to succeed instead.

    This item is Cursed. To remove your attunement to this item, you must first be the target of a Remove Curse spell, cast at 5th level or higher. While you are cursed by this item, you are jealous and protective of it. You do not want to let it leave your sight. Members of the Cult of the Dragon are unaffected by this curse.

    The curse may be removed from this item if it is targeted by a Remove Curse or Wish spell cast at 9th level. However, once it has been in the possession of a chromatic dragon for 7 days, it regains its curse. Some creatures are immune to the Charisma saving throw this items requires – any clerics or paladins sworn to Bahamut and metallic dragons may possess this mask without worry of succumbing to its will.

    The benefits of the item are exactly those conferred by the mask(s) in the module. The information on the curse, the item’s importance to the ritual, and the final paragraphs are the only additions I made.

    Now, this is close to perfect. It lets my party secure the item and make meaningful, tangible progress toward preventing the cult’s goals. But, even this minor curse, makes it nearly unusable. My party had no paladin or cleric (and none of them are secretly metallic dragons), so they’d be making this save each time they rested. It’s not a hard save, but the ranger who held onto the mask for their first long rest after collecting it failed the save. It influencing your character’s actions is pretty detrimental, but I think the real trouble comes from it forcing its way into a character’s attunement slots, despite the item’s clear power. They’ve likely got the items they want attuned on, right?

    Well, I solved that part of the problem, but I made a whole new one, didn’t I? Now, the party wasn’t gaining a cool magic item they could use for conquering these tough bosses. I didn’t want the byproduct of future-proofing this item (more on that in a future post) to be denying them a cool reward for beating their foes.


    So, How’s About a Second Item?

    Following the advice of a poster on /r/TyrannyOfDragons, I added an additional relic to the ritual inspired by an existing item, the Orbs of Dragonkind. These I envisioned as an optional component for the ritual; something the cult wants to retain, but not something they cannot afford to lose. (And Tiamat will be gaining a buff corresponding to the orbs the Cult of the Dragon still has, but we’re a few weeks out from that climactic battle and many of my players read this blog, so we’ll unfortunately be saving what that is for the final post in this series.)

    The orbs themselves are quite powerful. Honestly, probably a bit too powerful. However, the ones my players have gained were all used by the Wyrmspeakers in battle beforehand, so they felt the bite before they earned the boon. Here’s an example of what they do:

    Orb of Dragonkind (Black)

    Wondrous Item

    This unbreakable glass orb contains a swirling dark mist sparkling with specs of glittering dust. When staring into its ever-churning depths, on might see the flit of a dragon’s silhouette darting through the storm. While in possession of the orb, you may use a bonus action to invoke its magic, gaining the following bonuses for one minute:

    • +1 AC as black scales sheath your arms and shoulders
    • +1d8 acid damage to your weapon attacks
    • +1 to your spell save DC
    • Resistance to Acid damage

    Additionally, you gain the following action until the magic fades:

    Acid Breath (Recharge 6). Exhale a 20-foot line of acid. Each creature in the area must make a DC 15 Dexterity saving throw, taking 33 (6d10) acid damage on a failed save, or half as much damage on a successful one.

    When activated by a Wyrmspeaker of the Cult of the Dragon, this bonus action additionally heals the bearer for 70 hit points. Once the orb has conferred these bonuses, it dims and cannot confer these bonuses again until the following day at dawn.

    I think if I were to run this module again, I’d change the activation to provide the damage resistance, and then one of the other effects at the player’s discretion. As is, it’s rare someone benefits from the damage on their weapon attacks and their spell save DC anyway. Perhaps I’d let the AC bonus gain the breath weapon, too, since it might be the least selected option if they were competing. (Maybe wrap the weapon damage and spell DC together as Draconic Fury, and the remaining two as Draconic Majesty … hm.)

    Regardless, at the time of writing my party’s collected three of these from their adventures; even the one time they were too slow to claim a Mask of the Dragon (more on that in a future post), they still got an orb during their quest.


    So, there we have it. No bait-and-switch on the Masks; when the players earn them, they get them. Keeping them, however, remains a tough prospect, since I’ve got my thumb on the scale with that curse to get them to hand it off to someone who won’t be corrupted by it. To make up for that denial, we’ve got a nice secondary item that still will affect the final battle for their successes in retrieving them.

    (Look, I know it’s a bit of a run-around to get back to almost exactly where we’d be if the party either never looted a mask or if they weren’t mandatory for the ritual, but I’ve got something up my sleeve, alright? Stay tuned for the next posts in the series!)

    As always, thank you for reading! Good luck out there, heroes.

  • Reworking Tyranny of Dragons 4: Two Castles

    Reworking Tyranny of Dragons 4: Two Castles

    One facet of this double-book adventure that makes me wonder if the two books were written much in conversation with one another is the incredibly brief section Hoard of the Dragon Queen contains about Waterdeep. After months of travel with a caravan whose ultimate destination is Waterdeep, the module spares only six paragraphs for the city, and they’re basically all about how quickly the cult chooses to move through the city and in what direction. Now, it is still the party’s objective to follow the amassed wealth to its ultimate destination, but given that in Rise of Tiamat Waterdeep becomes a linchpin location the party returns to repeatedly, I wonder if this module should’ve at least contained a little bit of information on the city itself?

    Perhaps WOTC hoped DMs would buy the Sword Coast Adventurer’s Guide in addition to the module if they needed more guidance on the default setting, or they wanted to leave things vague enough for one to transplant the module into a homebrew setting (though personally I think that would be better printed to be ignored, rather than withheld). Either way, the module doesn’t present Waterdeep as much of a playspace when the party first ventures through it; instead, it’s just one more brief blip on their road trip north. At least it’s almost the last one.

    Between Waterdeep and the Mere of Dead Men lies Carnath Roadhouse. This small waystation serves as a depot for the resources being used to rebuild the road between Waterdeep and Neverwinter, and also a clandestine place for the cultists to try and lose any stubborn adventurers. Now, between being a little weary of more time on the road (and also obtaining so much information from Frida Maleer/Frulam Mondath with Detect Thoughts), my players more or less skipped Carnath Roadhouse. They had a brief stop, engaged a little with Bog Luck, and managed to find the tunnel out into the Mere before the cultists caught up to them. (Yes, caught up. With Longstrider uses and a much more agile group, the party got out ahead of the cultists and beat them to the Roadhouse and the Mere, but this is not without its own consequences and challenges; more on that later.)

    I don’t feel we lost much in glossing over the Roadhouse. I think it can be a decent enough hook for a session or two, but even the module itself doesn’t consider this particularly monumental – it’s the one chapter in Hoard of the Dragon Queen that doesn’t provide a level to your party if you choose Milestone Advancement. It is more or less one inn and one encounter, so it’s not the most integral thing. It’s almost more like a road event from chapter four rather than a full chapter on its own.

    And that let us move forward into a proper dungeon.


    Castle Naerytar

    After so much time spent on the road, the module finally remembers the game’s core elements once the party enters the Mere of Dead Men: dungeons and dragons. Twin dragons live within the Mere, and they masquerade as a singular dragon of incredible speed, coordinating attacks on distant locations to appear impossibly swift. These dragons are aligned with the Cult of the Dragon thanks to Rezmir’s persuasion, and they’ve shaped much of the situation within the swamp once the party arrives.

    For the dungeon, we have Castle Naerytar (which we held as an ancient name for the place, but renamed by the cult to Castle Umberstone), a sinking old fort whose sole redeeming qualities in the eyes of the cult are the cheap labor of the dragons’ enslaved lizardfolk and the teleportation circle in the basement.

    In the module, the party is meant to be presented with an option to help liberate these lizardfolk from the cult’s harsh yoke and that of the cult’s gleeful allies, the bullywugs. Now, I personally like lizardfolk a lot more the bullywugs, and I decided to make a slight change here. I exchanged the frog-folk for a second tribe of lizardfolk, ones who’d been in service to the dragons (but not knowing there were two) for generations: the Death-Hiss tribe. Then, the module’s original lizardfolk were called the Wizenroot tribe, and both were visible in their allegiances. The Death-Hiss, having long served the dragon(s) and several of their leaders being gifted with dragon’s blood or scales to grant them magic or armor, they had taken on the aspect of their masters: dark scales, sunken features, skull-like miens. The Wizenroot, meanwhile, were mostly green in scale and haler in appearance. These tribes had lived in quiet rivalry for many years, until one of the Wizenroot betrayed them in exchange for draconic sorcery – a lizardfolk I named Blessed Ulithara.

    My party quickly struck an accord with the Wizenroot tribe, and prepared to assault Castle Umberstone. Their allies, however, couldn’t prepare to aid them in a full-on assault until after the cultists would arrive, negating the lead the party earned from their earlier actions. Rather than wait for those reinforcements to arrive, the party snuck into the castle (I have too many PCs that can fly), had a small dungeon crawl to get into position, and then we ran a wave-based encounter of them trying to distract the guardsmen of the castle until Jemma Gleamgold could throw open the gates and allow what few Wizenroot soldiers were nearby to flense the Death-Hiss from the fortification. This, obviously, isn’t anything like how the module would have you run this dungeon, but it proved an exciting combat for my players, and resulted in the death of an NPC ally that broke their hearts. (Not Jemma.)

    The leader of the Death-Hiss tribe remained beneath the castle in the tunnels below during this commotion, and we retained enough of a dungeon crawl in the tunnels as the last holdouts of the Death-Hiss were slain. Then, our heroes used the teleportation circle.


    Skyreach Castle

    In the second post in this series, I explained most of my table’s tour of the Hunting Lodge in this campaign. We spent even less time in Parnast, however. Accompanied by Talis, the party feared they might have an angry abishai after them, and after only an hour of their time in the village, they watched Skyreach Castle begin to take flight. (They rested overnight at the lodge, and Rezmir didn’t want to take any chances after the forces at Naerytar failed to check-in.)

    My party immediately activated their various means of flight and gave chase. And, in Skyreach, I once again made some pretty substantial changes. First, rather than Blagothkus simply going along with the cult’s wishes in hopes that the dragons amassing power might spur his kin to action, he’d become their despondent prisoner. Shortly after allying with the Cult of the Dragon, Rath Modar (and his simulacrum) assisted in capturing Skyreach for the cult, and he used dark sorcery to gain command of Esclarotta’s spirit as it became the new steward of Skyreach. Too frightful of their ability to harm his wife’s spirit, Blagothkus surrendered.

    As our party approached Skyreach, they heard her voice, urging them forward. “Enemy of my enemy, be welcome. Find Blagothkus in the Grand Tower. Grant him your aid and rid Skyreach of its usurpers. I will hide you from the sentries.” Talis expressed concern for listening to this strange voice, but followed the party to their chosen destination.

    Freely, I admit the following changes are much more specifically to my taste (and that of my table), but rather than retain the whole dungeon with its myriad encounters with cultist warriors, ogres, and kobolds that would only be dangerous in excessive numbers, I instead used this scenario to allow the party to act as a clandestine strike force. Blagothkus shared with them a map of the castle, and expressed that once the cult’s leadership – Rezmir, Sandesyl, (the simulacrum of) Rath Modar, and Glazhael – were vanquished, he could rally the ogres within the castle to eliminate the cultists and grant them sanctuary. I gave the party the unlabeled copy of the map from the module, and explained which rooms these targets could be found within. (Almost all were where the module would place them. I moved Rezmir into the larger room beside her chambers and reimagined it as a throne room, but otherwise, little changed here.)

    One by one, my party snuck through the castle to these various encounters (using the tunnels to Glazhael and Rezmir, then flying down to Rath Modar’s balcony) and vanquished them each in turn. The vampire, they managed to burn within her coffin before night fell by exposing her to the sun, and Blagothkus’s forces exterminated the cultists, who failed to mount much of a counter offensive with their leadership eliminated.

    And, with that, we reached the end of Hoard of the Dragon Queen and the first half of his module. From the various notes and documents in the castle, from the spirit of Esclarotta herself, the party discovered the destination of all the stolen gold and were on their way back to Waterdeep to begin the next leg of their adventure, with a Mask of the Dragon in hand.

    One which an Identify spell had given them a lot of information on … But that’s a tale for another time.


    Sorry for the delay since the last post; there’s been quite the string of games since then, huh? The last season for the War Within began and, as usual, I was playing a ton for a few weeks there to get all the new gear. Just as that settled down, we had the sudden release of Silksong! which I really did at times doubt we’d ever see. And then Hades 2! But, as of writing this, I’ve wrapped all those up … just in time for Legion Remix on warcraft.

    … Look, let’s hope I get something else out this month, but no one hold their breath, alright?

    As always, thanks for reading! Good luck out there, heroes.

  • Reworking Tyranny of Dragons 3: The Long Road

    Reworking Tyranny of Dragons 3: The Long Road

    When I first ran Tyranny of Dragons 10 years ago, no chapter provided as many headaches as On the Road. Back then, I was running the module almost entirely as written – we added a handful of optional things over the course of the entire campaign, tied into the character backstories (as I often do at my table), but that was well after we got through this chapter.

    For the uninitiated, the fourth chapter of the module asks the players to follow the Cult of the Dragon all the way up the Sword Coast, from Baldur’s Gate to Waterdeep and beyond. During that trip, your party of heroes is expressly meant not to hinder the cult. Their mission is to discover where all this stolen gold is going; not to prevent it from reaching its destination. It suggests they should hire on as guards, gives you a handful of resources for NPCs and events (with a couple it states must take place), and tells you this trip should take about 2 in game months.

    Now, unless you choose to abstract almost all of this travel, it’s unlikely you’ll get through the whole thing in one game night. And, if you do skim over it, you’re cutting one of the eight chapters in the Hoard of the Dragon Queen book (remember: these were once sold separately), and 10 pages of content of a 94-page module (including the pages of appendices). You are cutting characters that have more information on their personality in their sole paragraph than some of the cult’s villains possess (i.e. Frulam Mondath). You’d be disengaging with one of the module’s few opportunities to interact with cultists without the threat of imminent violence. (Probably. We’ll get to that.)

    All this is to say, I don’t think you can really afford to cut it, but … it’s also one of the most boring adventure beats ever written?

    This module begins with a dragon attacking a village that your level one heroes drive off. Then it asks them to spend two months on the road to follow the stolen gold? And it doesn’t save any of its interesting characters introduced to the party in Greenest for this chapter? Only two named members of the Cult of the Dragon* exist in this chapter: Rezmir and Azbara Jos (*allied to the cult, technically). Rezmir is meant to remain in their wagon and unseen, and the module explicitly says Jos does not mingle with other travelers and seldom speaks to anyone.

    So … what’s supposed to happen, exactly? Is the tension of this chapter meant only to be “are your players going to forget that they’re not meant to screw with the cultists?”


    Let’s Talk About the Events

    On the whole, the events the module provides are pretty good. Of the twelve “optional” events, I used 4 pretty much as written, one with a change to its enemies, and another that I made a major change to and turned into a whole dungeon (more on that later). I think any of them could provide a decent hook for a session, or at least half of one. However, of these, almost none of them feel like they mean anything to the module’s “main quest.” Like, only Contraband and Payback wrap back into what the party is doing in any way whatsoever. That’s not necessary, of course, but it does mean that these can’t fill the void left by an utter lack of central tension in this chapter.

    As for the “planned” events, there’s Recognized! (which isn’t one of the “mandatory” planned events), which is triggered as a consequence for the party being blasé earlier in the adventure, skulking about the camp long enough that someone in the caravan recognizes them. The module considers a failure state of this event being that the cultist shares that information, and says that it can’t be permanently solved without murder. (It even has the gall to say if your good-aligned PCs don’t like that option “that’s roleplay.” Uhh, maybe finding an entirely different solution is roleplay?)

    Then, it has three events that happen after Jamna Gleamsilver (an agent of the Zhentarim) joins the caravan. The first is Unwanted Attention, which is less of an event, and more of a Perception check that tells the players the new gnome in the caravan is being a little odd. Then, there’s Who’s Your Friend? where Gleamsilver plants a bone sliver in their oatmeal to try an create a relationship with them by pretending to save their lives. Lastly, there’s Murder Most Foul, where in the morning, the camp awakens to discover a dead body (belonging to a cultist), where the party gets accused of the murder given an assumed animosity, but it was actually Jamna Gleamsilver who couldn’t stop herself from trying to steal some of the gold the cult is transporting.

    On my current run of the module, we made major changes here. First, there was no need for Recognized! because, rather than pretending the cult wouldn’t recognize the heroes of Greenest who stole their hostages right out from their camp, we had both parties entirely aware of each other the entire time. The cultists would’ve loved to have the party removed from the caravan, and they were looking for any excuse to force them out. The party, meanwhile, had reason to interact with the commonfolk of the caravan, building up their reputation among them, and each event we ran built them up as heroes of the caravan, making them more respected with each success. Additionally, we had preserved Frulam and Cyanwrath (as slightly/greatly altered characters, check out the previous post in this series), and allowed them to be the mouthpieces of the cult on the road, which let the party interact with characters during the two months they’d be traveling.

    Then, we didn’t end up having Jamna Gleamsilver murder someone for treasure, though I ran her other two events as written. Instead, the party’s own actions gave us a moment of confrontation with the cult, and led to some emergent moments where they were able to deal a blow to the Cult of the Dragon without being ejected from the caravan.

    And, genuinely, I think that mattered a lot. When I ran this module previously, my players were absolutely dying to do something against the cult. We had a PC try to steal some of their gold, get caught, and publicly punished and ostracized for their actions. Over the real-life months we were working through this road trip, the players itched to do something against their enemies; they didn’t like that their goal was to sit around and wait for the module to progress to the next step. The module hadn’t given us a central tension – and I hadn’t diagnosed that issue when I first ran it.


    The Event That Became A Dungeon

    I mentioned briefly that one of the events I changed and expanded into a dungeon. I knew I wanted a dungeon in the middle of the road trip from the beginning, and I wanted to throw a wrench into the event, too. So, I adjusted Roadside Hospitality, which has two doppelgangers join the caravan and try to lure someone out and potentially replace them, into one of my favorite enemies in D&D: a hag.

    An unassuming old lady joined the caravan and took immediate interest in a pregnant mother traveling alone to live with her sister in Waterdeep after her husband’s recent death. Now, my table knows me, and they clocked this from a mile away. However, I was able to employ my NPC, who berated the party for their rudeness. That got them to back down long enough for the kidnapping to occur and the dungeon to materialize.

    From conception, I’d had a plan for this dungeon. As I mentioned in the last post in this series, I’d expressed in session zero that some members of the cult could be rescued from it. For this dungeon, I’d known from before session 0 I’d be attaching either Cyanwrath or Jhos as an ally to them for the duration, depending on who they had more affinity for. Alternatively, if they’d entirely rejected the possibility of saving either, I thought it might be fun to attach Frida (edited Frulam) or Rezmir to the party as tense allies for the dungeon. Given the events of our game, Cyanwrath joined them, committed himself to pursuing heroism, and that all led to further events in the campaign. Our party rescued the mother and that grew their renown yet again, which built them up in the eyes of the caravanners which made it harder for the cult to–you get the gist.

    The point is this: with a couple of small changes earlier in the module, we were able to salvage this months-long road trip into something engaging by simply finding a central tension. We spent ten sessions from August to December traveling from Baldur’s Gate to Waterdeep, and it wouldn’t have worked half as well without these changes. This video from Matt Colville dives deeper into central tension, and it’s something I’ve kept in mind for adventure building and fiction writing ever since.


    As always, thank you for reading! I genuinely think so many of the adjustments I made to this module were in pursuit of making this chapter better. It nearly killed our table when I ran it originally; I guess I felt challenged to find a way to salvage it. At least for my table. And, well, that’s who I’m running the game for!

    Anyway, good luck out there, heroes.

  • Reworking Tyranny of Dragons 2: Preserving Characters

    Reworking Tyranny of Dragons 2: Preserving Characters

    One of the ways I think Tyranny of Dragons is most inconsiderate of its own resources is the way the module uses its own characters. Particularly the villains of Hoard of the Dragon Queen (the first half of the module, formerly sold as a separate book). By the time the party hits Rise of Tiamat, they’ll be interacting with the Council of Waterdeep and meeting familiar faces when they do. Before then, who do they have? Leosin? Maybe Rath Modar’s apprentice, if they interact with him during the On the Road chapter?

    Cyanwrath and Mondath are meant to be discovered in the Dragon Hatchery and likely killed on what is at most their third interaction with the party (but more realistically, it’s the second). Rezmir travels incognito, so they won’t interact with her much before facing her in Skyreach Castle. Within Skyreach, they’re meant to encounter Rath Modar who escapes, but the first time I ran this module, he failed to do so. (Sentinel and one spell cast per turn really messed him up.) The party has no way to learn about Dralmorer Borngray before facing him in Naerytar. These characters all have custom stat blocks! Official artwork! Yet none of them get used more than once?

    It’s wasteful.

    So, we changed a lot here – at least for some of them. Let me explain.


    Langderosa Cyanwrath

    Named Langdedrosa in the module, Cyanwrath is presented as a champion fighter of the Cult of the Dragon who loves a good one-on-one duel and is willing to exchange captured hostages to the party’s custody to get one. He’s even got a savage streak, striking them once more when they’re down or killing the NPC that will duel him (if the players refuse) after he’s already beaten.

    I changed him entirely.

    Back in session zero, I told my players that there would be opportunities throughout the campaign to pull people out of the Cult of the Dragon – that very few of them were so far gone as to be absent all reason. I had two specific characters in mind when I said this: Azbara Jos (more on him later) and Cyanwrath.

    Cyanwrath from the Hoard of the Dragon Queen Module
    Re-imagined Cyanwrath made with HeroForge

    Rather than the brash and devoted warrior, I reimagined Cyanwrath as someone who’d never been given any agency in his life. His father, Lennithon, the blue dragon that aids the assault on Greenest, had allied with the Cult of the Dragon before his birth, and he was raised in that cruel and careless environment. I envisioned him as possessing a strong sense of honor and compassion – one he had to actively work to suppress while with the Cult of the Dragon to the extent that he would overreact to any doubts or aspersions with vehemence. But nevertheless, it peeked through.

    His mercy at Greenest was the first of these cracks the party witnessed. With that flimsy justification of a duel, he was able to allow the heroes to escort the villagers away and still hold that shred of believability. Later, when our party rescued the villagers from the cultist camp, they saw Cyanwrath at the edge of the entrance, in position to try and chase them down and perhaps catch them, slowed as they were by their charges. Instead, he returned to the camp.

    Over the course of the long trip from Baldur’s Gate to Waterdeep, the party kept working at this knot, and eventually Cyanwrath sought them out himself, trying to make sense of his inclinations and his upbringing. He even joined the party as an ally as they delved into a homebrew dungeon I added in the middle of the On the Road chapter to break up the days and days of travel, aiding them in rescuing a pregnant mother from the clutches of a hag (more on that in a future post).

    However, despite how he tried to hide his decision to aid the party, Frida and Rezmir knew, and tortured him for failing to cut them down.

    And on his behalf, the party intervened. They broke Cyanwrath free and sent him onward to Daggerford.

    And Frida came down upon them immediately.


    Frida Maleer

    In the module as Frulam Mondath, this was a character the players had no chance to turn away from the cult. However, instead of leaving her to die in the Hatchery, I retained her as the cult’s primary face during the long journey north. She served as Rezmir’s voice on the road, and when the party sprung Cyanwrath, she insisted they be ejected from the caravan. The captain of the caravan tried to mediate the situation, but it was simply one party’s word against the other’s. With Frida as the only cleric in the caravan, no impartial party could provide a Zone of Truth.

    The captain managed to have them agree to allow the priests at the Temple of Waukeen to adjudicate once they reached Daggerford that afternoon. The trial ultimately fell the party’s way, but despite her arrest, I’d intended to keep using Frida – perhaps have the party encounter her once more in Castle Naerytar or Skyreach, but thanks to a few high perception rolls and Sending spells, the party intercepted Frida and the cultists who’d gone to break her out of prison and defeated them all.

    Despite my plans getting upended, I certainly feel like I got a lot more out of Frida than I would’ve gotten from Frulam Mondath. Even in death, thanks to a Detect Thoughts spell, she gave the party a lot of information about their upcoming adventures.

    Frulam Mondath artwork from the Hoard of the Dragon Queen Module.

    Azbara Jos

    Despite some major edits to his character, I didn’t actually change this name much. I settled on “Azbara Jhos,” so for clarity, we’ll use Azbara when I mean the version of the character from the module, and Jhos when I mean my version of the wizard.

    Now, first things first, I think there’s too little race-variety in this module (it’s one of the reasons I made Leosin into the orc Brok) (I also just like orc heroes). One of my players picked genasi for her race, and I made Jhos one, too. I imagined him as a young wizard – a true apprentice, one who fled Thay and had no option but to accede to his master’s plans. At only 19 years old, this was another character the party could’ve pulled out of the cult.


    Azbara Jhos re-imagined with HeroForge
    Azbara Jos from the Hoard of the Dragon Queen Module

    (That “could” is giving a lot away, isn’t it?)

    As in the module, Jhos joined the caravan and didn’t socialize much. What few times he might’ve been seen, he’d have been talking to Frida, until trolls ambushed the caravan. There, he got a proper introduction: flinging fireballs at the trolls when the party was only just cresting level 4. Even despite benefiting from the caravan’s ability to travel safely and without delay, it’s hard for me to imagine Azbara doing the same. Jhos got hailed as a hero, and then the party started poking at that scab throughout their journey.

    They were only a few carefully chosen words from rescuing this guy, but, unfortunately, it didn’t materialize. He met his end when the party battled him and Rath Modar in Skyreach Castle. When they arrived, they overhead him just about to spill the beans on them all to Rath Modar after the two had discussed the cult’s swelling need for mages. Taking that last tidbit to heart, our party’s fighter felt they couldn’t risk leaving Jhos alive, and struck him down.

    Rath, however … Heh. Let’s just say I only ever need to learn a lesson once.

    Rather than being present in the flesh, I imagined that Rath might need to be in many places at once to prove his value to the cult. Thus, the Rath Modar present at Skyreach Castle was merely a simulacrum that crumbled into a rapidly melting mound of snow upon his defeat. The party still got to learn a lot about the wizard – his capabilities, some of his spells, but he was never in danger of being lost so early.

    And, there’s one final character I wanted to discuss here.


    Talis

    Shortly after session zero, I asked my player who chose to play a Draconic Sorcerer if he’d be up for a connection to a character in the module in his backstory. I pitched that he and Talis were childhood friends, meeting while both under the tutelage of a wizard. (I also did make her a wizard, rather than a cleric.)

    While on the road, the party used Sending to contact Talis and discovered that she’d become a hostage to the Cult of the Dragon, just as the sorcerer feared. She was unable to tell them much about where she was, but the party encountered her exactly where they would in the module: the Hunting Lodge they teleported to following their adventure in Castle Naerytar.

    There, she told them a troll kept her within the grounds, and that an abishai would often return to the lodge and might have some field around the area that would alert him if she left. Reunited with his childhood friend, the sorcerer urged his allies that they rescue her, and they battled the troll, then later the abishai as they flew up to Skyreach Castle.

    Once there, Talis revealed that she had developed some level of kinship with the white dragon within the castle – that he’d given her scales to make into armor (and here she dispelled an illusion that revealed the scale mail she’d been wearing all along). She urged that they visit the dragon, that perhaps she could turn him to their cause!

    And she absolutely betrayed them.

    It was glorious.

    Talis the White from the Hoard of the Dragon Queen Module.

    I think this wouldn’t have worked if the party hadn’t been successful with turning Cyanwrath. Even then – the party’s ranger/rogue multiclass was about the scrap the whole plan, feeling off about the whole thing. (Expertise in Deception never served me so well.)

    With Glazhael fighting them, Talis managed to effect an escape after a delightful villain monologue, and at time of writing, she has yet to turn back up in our game. Considering that the last time I ran this module, she died within an hour of the party arriving at the Hunting Lodge? I’d say we’re doing pretty well here.


    So! That’s how I’ve adjusted some of the characters from the first half of the Tyranny of Dragons module to give them some more longevity, some … recurrence. Even those we’ve lost along the way have still impacted the campaign in a much fuller way than their counterparts in the module. Now, I wouldn’t just outright say this is better as a matter-of-fact; it’s only different.

    And more to my liking, I guess.

    Anyways, thank you for reading! Good luck out there, heroes.

  • Reworking Tyranny of Dragons 1: Greenest

    Reworking Tyranny of Dragons 1: Greenest

    I mentioned last year that I’ve been running Tyranny of Dragons for my table. I used the module once before – back when it and 5e were in their infancy, and I was a much younger DM. I held onto a lot of lessons from running that game, and now, revisiting the module, I’ve made many changes to improve on what WOTC published.

    Because, frankly, the module is written as a pretty sloppy railroad.

    That doesn’t mean there’s not the potential for a good game in it, though.


    Improving Greenest

    As the module is written, the game opens with the party arriving while Greenest is under attack. From the road, they can see the smoke from the fires rising skyward and the blue blur of the cult’s dragon ally swooping overhead. There’s powerful imagery there, absolutely, but it also leaves a little too much to chance, doesn’t it? It wouldn’t be unreasonable for a party of level 1 adventurers to see the ongoing raid and think, This is too much for us. We’re nobodies. To assume that to intervene will end only in their own deaths – and the module is printed to begin at first level.

    I imagine WOTC hoped that this immediate, dynamic set of encounters would help onboard players into the campaign, but unless you run a really good session zero that impresses upon your players that they’ll be expected to play incredibly heroic to meet the module where it is, it leaves a lot open.

    I did two things to improve this.


    Starting on the Road

    I started with a much lower stakes first session, having our party all be part of a caravan journeying to Greenest from an undisclosed elsewhere. I left it up to each of them to decide why their characters were part of this caravan – perhaps Greenest wasn’t their final destination, perhaps they’d been following the trail of destruction left by the Cult of the Dragon as they raided Greenfields. (As part of our session zero, I encouraged the players to build PCs that would oppose the Cult of the Dragon’s activity and let them know they’d fight a fair amount of dragons throughout the campaign, inviting them to build characters with that style of encounter in mind.)

    We had a new player join the table for this campaign, so this slower start also helped them ease into character and the style of table we have. As part of this session, we had a small roadside ambush encounter and an investigation to discover that one of the travelers was a member of the Cult of the Dragon who’d drawn the guard and ambush drakes to attack the caravan. The death of an NPC guardsman ally with family in town gave them a reason to care about at least one group of potential survivors in the upcoming raid on Greenest, and delivering his belongings served enough of a quest to keep them together. (This was all emergent from the play of the first session – if I were to run this module again, I’d consider trying to lean on this further. Maybe I’d make this NPC the captain of the caravan and have them speak to the PCs individually, especially if they were not yet a group, just as mine weren’t.)

    (Also, I’d made some tweaks to the ambush drake statblock, but more on that in a later post.)

    The other major change – they leveled up from this encounter and investigation. Now at level two, they’d feel at least slightly more powerful for the incoming “dungeon.”


    Arriving at Greenest

    Map of Greenest from the module.

    Time is the most potent tool in the GM toolkit. See, I’d planned to kick off the assault on Greenest at night and I wanted the party to start in the center of town, inside the inn. However, the party was a group of particularly active characters, so I needed to ensure they stayed in Greenest overnight. Thus, After a long day of travel, just as twilight strikes the skies, you finally arrive at Greenest, exhausted and road-weary.

    I still had them propose leaving town after delivering the guardsman’s sword to his family to camp, to get that one hour of travel they could still swing based on the time of day. So, even this wasn’t perfect – but it did work.

    They ran a few errands in town, bought some supplies, and settled in at the tavern for some character RP. After a few minutes, I, despite having the information available surreptitiously, asked them outright for their passive perception scores. As they handed them in, I paused, then told the PC with the highest total that they began to hear something unusual – a slow thwump… thwump… thwump, muffled not only by the walls, but by distance. However, they were growing steadily louder: Thwump, Thwump, Thwump.

    And then, an unconscious stillness shattered against the dragon’s roar.


    The Raid on Greenest

    I opened with the blue dragon blasting a line of lightning through the town that struck the walls of the inn. Everyone in the party failed a Constitution save and were stunned as the inn trembled and lost one of its walls. They recovered after a few moments – had it been minutes, seconds? And heard the sounds of violence outside!

    In the town square, the cultists had swarmed into the market and were swiping goods from abandoned stalls and menacing townspeople. Our heroes erupted into action!

    I left many of the scenarios of the raid unchanged, though I adjusted the encounters in some areas. With all the people they rescued from the town square (including their guardsman ally’s family), they delivered them into the keep through the secret passage, then they held off against the cultists trying to breach into the fort, used the ballista to scare off the blue dragon (which required some doing! It had been in disrepair and the fighter literally braced the arms of the ballista on her back to allow the ranger to fire it), then ventured out into the town to reach the chapel of Chauntea to rescue the townspeople trapped within. (Here, I borrowed a little from Ebonskar. While the town burned, the chapel hadn’t caught fire despite the cultists’ attempts to set it ablaze.)

    And, finally, as they worked their way back to the keep with these townspeople in tow, they encountered the cult’s lieutenants: Langderosa Cyanwrath and Frida Maleer. (Yes, I changed their names from the module, I didn’t like them much.) As we’ll discuss in the next post in the series, I’d made some MAJOR changes to these characters, including ones I thought would make Cyanwrath more likely to allow the heroes to rescue the people within the chapel – though he still demanded a duel. Our melee-focused sorcerer accepted, got torn apart, and Cyanwrath held to his word (despite Frida’s jeering) and allowed them to escort the townspeople to the keep.

    However, there were many other townsfolk who did not benefit from the party’s intervention, and they were carried off to …


    The Cultist Camp

    I preserved the encounter with some lazier members of the raid lagging behind from the rest, and our party elected to steal their robes to infiltrate the camp. Within, the party was able to see the cult preparing for a mass sacrifice later in the evening – the reason they’d captured the townsfolk to begin with. There were more prisoners than just those taken from Greenest; the cult had taken some hostages from the other towns they’d raided, and it was going to take some serious finesse to rescue them all before the pyre burned.

    Luckily, they had an ally within. I made major changes to the module’s character or Leosin Erlanthar – namely, I changed him into an orc monk named Brok Stonebrow. He’s still a member of the Harpers, but one of the members of the party was his protégé, and had come to Greenest with Brok to try and infiltrate the cult.

    Surreptitiously, they met in the small caves that wind through the walls of the gulch, and they were able to work with him to devise a plan to rescue the townsfolk. This was almost entirely player-directed – I gave them the scenario, they worked it out from there. They knew they needed to handle the cultists in the watchtowers, and lead the townsfolk around the edges of the gulch to avoid the eyes of the celebrating cultists and mercenaries.

    I recognize this amount of freedom might not work with every table, but that’s the benefit of Brok / Leosin not getting himself captured. If your party needs more direction, he can give them more straightforward ideas; at a minimum, he can point their thoughts to the problems they need to solve, to save them from getting stuck on a tangent or lost in the weeds.

    The players ultimately succeeded, and this gave me another opportunity to display the cult’s ruthlessness. Rather than cut their losses, when the party later returned to investigate the Hatchery (some more on that in the next post), they discovered the cultists substituted their sacrifice of the villagers with the mercenaries who’d aided them in their assaults. Such savagery would only hint at the things to come …


    Wow! That was a long one. Before you go, I wanted to direct anyone looking for further reading right now to the subreddit dedicated to discussing this module. It certainly gave me many ideas that I’ve been using in my game.

    As always, thank you for reading! I hope this series of posts will be of use to someone – maybe even just as an example of how we might improve upon the ideas we find within the pages of a module. But, that’s certainly enough out of me; see you in the next one. Good luck out there, heroes.

  • June 2025 Irregular Update

    June 2025 Irregular Update

    So, here we are again. Look, I won’t beat around the bush. It’s been a tough year, hasn’t it? With everything going on in the world, (especially right now) it’s been hard to get into a space for writing. There’s been a lot of times this year that the only thing that could still my mind at all was this hobby I returned to in December (more on that later).

    I’d love to be showing up with great news about a project, but the truth is I don’t have anything to report on. As mentioned before, the Tide rewrite totally stalled out, and I almost got started on something else before getting entirely derailed. And not by video games this time.

    So. Let’s dig in.


    Returning Hobby?

    When I was in my teens, just after I’d been working for a while and had this sudden surplus of disposable income, my friends and I got into the nerdiest hobby on the planet: Warhammer 40k. We assembled and painted overpriced plastic miniatures and played pretend-war on the tabletop and had a blast. Some of my fondest memories are of those days – of visiting a local game store and playing all day, getting everyone some food at McDonald’s or Cici’s Pizza for cheap.

    And, my first models for Warhammer 40k were a gift from my grandma. When we started, our friend had gotten the Assault on Black Reach starter set, and two people locked in with the Space Marines and Orks. The original owner of that set settled into Eldar, and I started with the T’au Empire. We played games (not to exact specification of the rules – we never ran objectives and had little in the way of terrain), painted, and enjoyed talking about the game and lore.

    I probably hadn’t painted any models in 8 years by the time December rolled around. But, after playing some Space Marine 2 with my friends and peeking at the minis, I finally caved at bought back in, starting with the Orks – the army I’d been leaning toward switching into near the end of our original time in the hobby.

    See, as teens, we all painted our share of orks. Our friend had more bodies than he could paint himself, and we were all happy for the practice. I got pretty good at painting orks, and, honestly? I think I’ve retained that skill.

    It’s been a much needed piece of serenity these last few months, and with the friends I’ve made in my guild on Warcraft, we’ve got our own little meta forming; one guy’s playing Death Guard and Custodes, another’s on Dark Angels and he’s brought in a friend playing Votann and Chaos Knights; we’ve got players on Tyranids, Imperial Guard, and Necrons. I’ve gotten a fair few games under my belt, and I’m looking forward to trying to find some time to play in person at a local store again. (We’re all across the continent, so we’ve been playing on Tabletop Sim.)

    So, that’s been my main focus the last little while. It hasn’t entirely stamped out writing, of course. I’m still running a D&D game weekly, and I’ve been running a once-to-twice a month game for my family. And, I’ve written little bits of lore about my army of Orks and the characters therein, written up some small narrative moments from some of the battles we’ve had.

    I mean to say I’m still exercising the muscle, even if I don’t have a book to report any progress on.


    … But You Will Write Another Book, Right?

    Yes. Yes, absolutely.

    Look, there’s been times when this has been disheartening. There’s been times when I’ve questioned whether it was worthwhile to keep paying the upkeep on the site and blog – especially since I have these long stretches where I do nothing with it. But, ultimately, writing means a lot to me. I’d be lying if I said I didn’t care if no one read me – I want my stories to mean something to people.

    For that to happen, though, I have to write the damn things.

    So. I’d better do it then, huh?


    How’s About the Blog, then?

    Oh, yeah. So, you might’ve noticed the new digs. I’ve changed hosting services, and, after all the work I put in over the last week to set this all up, I’m going to hit myself if I keep letting this slip through my fingers.

    I get into my head about it, is the problem. I often feel like I have little to add or nothing of note to say. But this is my corner of the internet. If someone doesn’t want to hear what I have to say, they can good and damn well leave, can’t they?

    And if you’re one of the ones sticking around, thanks. Thank you for reading.

    I’ll see you again in the next one.